I thought I’d take a short break from the technology topics to talk about a new mini-hobby I started: DIY home improvement. As with a lot of my side hobbies, I’m not ashamed to admit that half of the fun comes from purchasing the parts or tools that I use for the hobby. The good thing is the tools quickly pay for themselves as you take on more projects yourself.
Let’s start with the tools, then I will cover the projects. These days, batteries are good enough to power almost anything, and the convenience for me outweighs the slightly higher cost. As I noticed after getting a coordless vacuum cleaner, you never reach for the corded vacuum when you have a cordless one.
The first tool you might buy would be a drill. Drills primary purpose is to drill holes in things. A secondary purpose would be to screw in fasteners. If you want to screw things in more effectively, you will want to buy an impact driver. The difference is that the impact driver has a sort of hammering action used to apply torque whereas a drill is more linear. The sound is noticeably different when you are using them. You can find reviews on sites like YouTube, in particular I like this guy’s channel. His channel may not help you find the best tool for yourself, but it is fun to watch the scientific way he tries to review the tools. When you dive into cordless tools though, you are buying more into the ecosystem rather than choosing the best of each. Most of the big brands make everything a DIYer would need.
Drills and impact drivers are often sold as a set, so if you don’t have either, you’d probably want to buy both as a set. I didn’t know any better so I bought everything individually (keeping an eye on sites like slickdeals). When looking at cordless tools, there is more vendor lock-in I suppose because ideally you want to re-use all the batteries you have and not have to buy separate batteries and chargers from different companies. I ended up choosing DeWalt for all my tools, their 20V XR brushless motors and 20V/60V flexvolt system seemed like it would cover anything I needed.
Before you go out and buy a regular drill, you might want to take a look at hammer drills also. Hammer drills are like regular drills, but they also have a hammer mode that basically adds a hammering action to the drill so that you can drill easier through concrete. I picked up a hammer drill to help drill through a tough concrete wall in a project I did. If I had known better, I wouldn’t have bought the regular drill first.
As far as bits go, you may want to look for ones that are impact rated for your impact driver to ensure they can handle the extra forces. For drilling concrete, you’ll need separate masonry drill bits. It’s probably better if the masonry bits mention hammer drills. I got some random brand of masonry bits off Amazon that melted/chipped after 2-3 holes, but the DeWalt hammer drill bit lasted the whole job.
I also bought a DeWalt 60v circular saw (easily cut fence board), a DeWalt flexvolt reciprocating saw (cut tree branches, fence posts), a $100 jack hammer on Amazon, and probably some other random things that slickdeals lured me into.
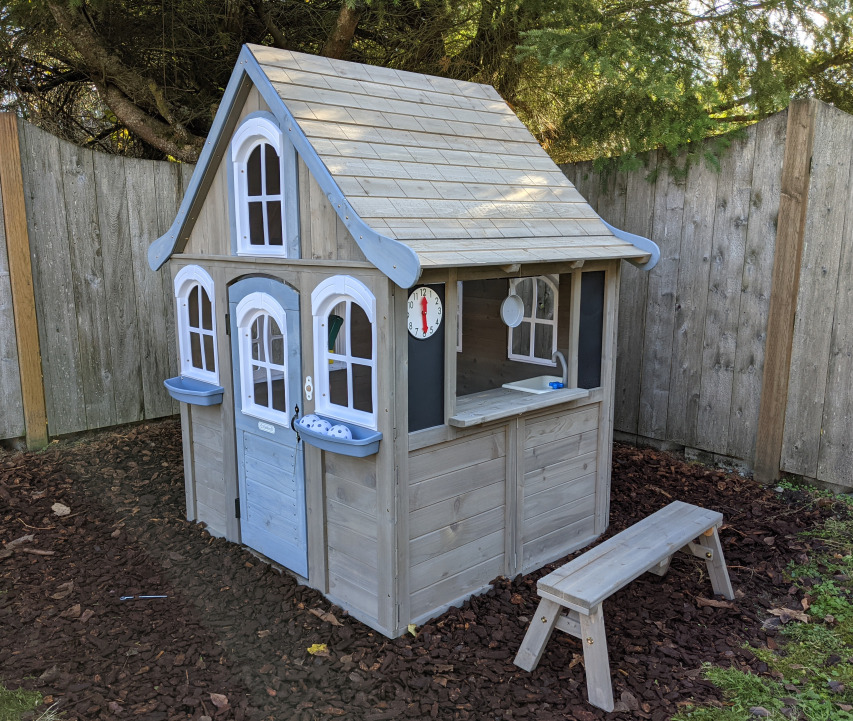
The first project was a kids playhouse. There wasn’t much too this one once you find the instructions online. It’s sort of like a big IKEA project.
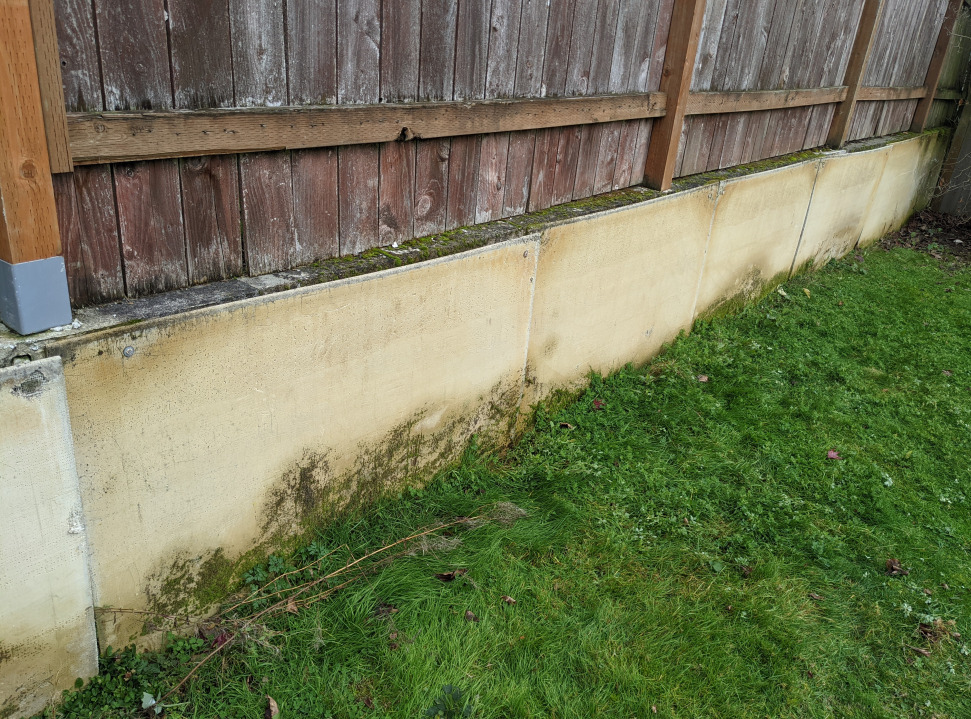
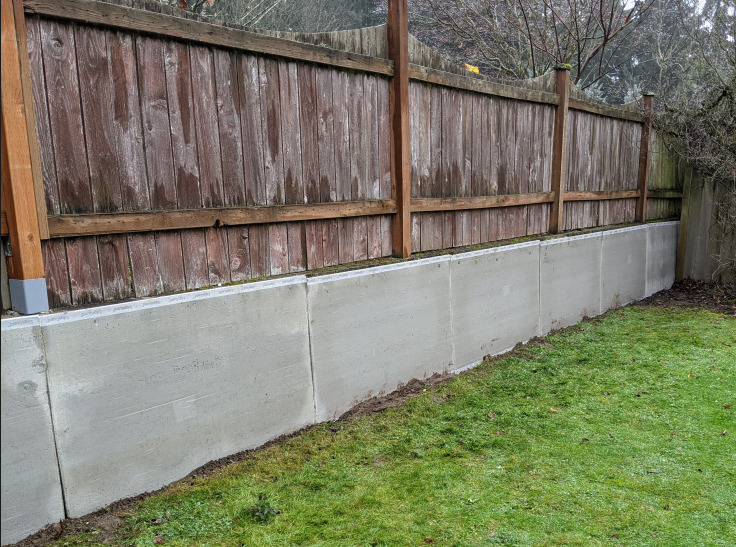
The next project was to replace the Durock cement boards along the side of my back yard that were detaching from the wall. I attached the new boards with some durock screws, washers, and screw anchors. Since it’s outdoors and cement board is corrosive in its own way, you need to make sure you’re using screws and washers that can handle the conditions.
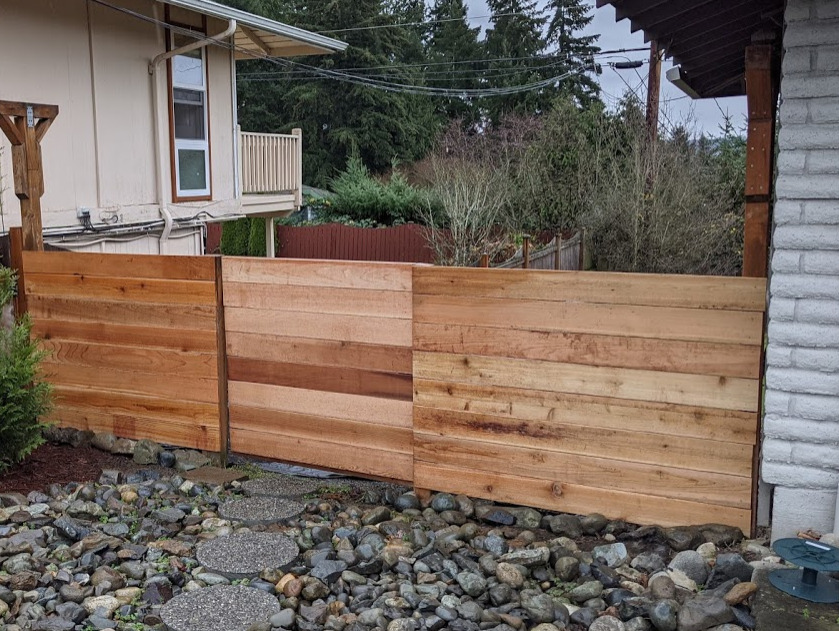
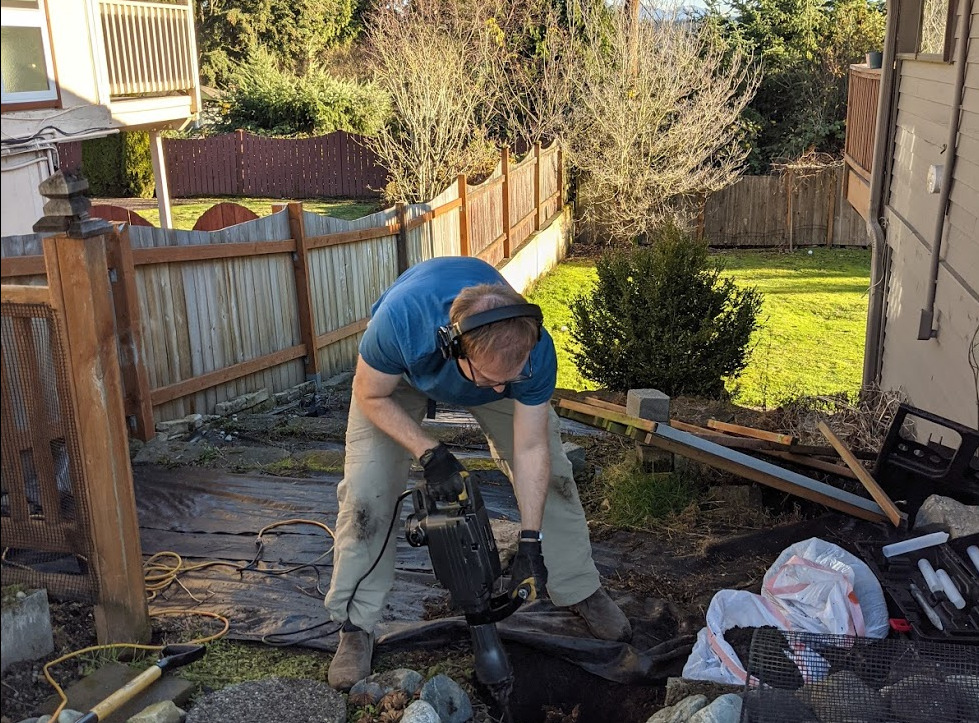
The last project was to replace a small fence and gate on my side yard. This project only happened because the fence post holding the gate rotted through and actually detached from the ground. I guess this is a lesson that even with pressure treated 4x4s, you don’t want to have wet dirt around the base or it can eventually rot the wood through. The forces of the gate must’ve caused the wood to rip into two.
The first part of the project required that I remove the old fence post from the ground. I bought a jack hammer to break up the concrete:
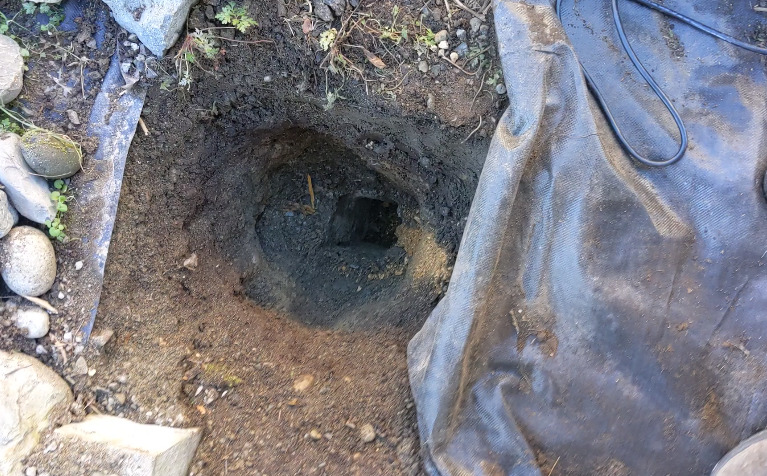
The hole went pretty far down so I kept the last foot of concrete. It was hard to clear because the dirt kept rolling down the side into the center:
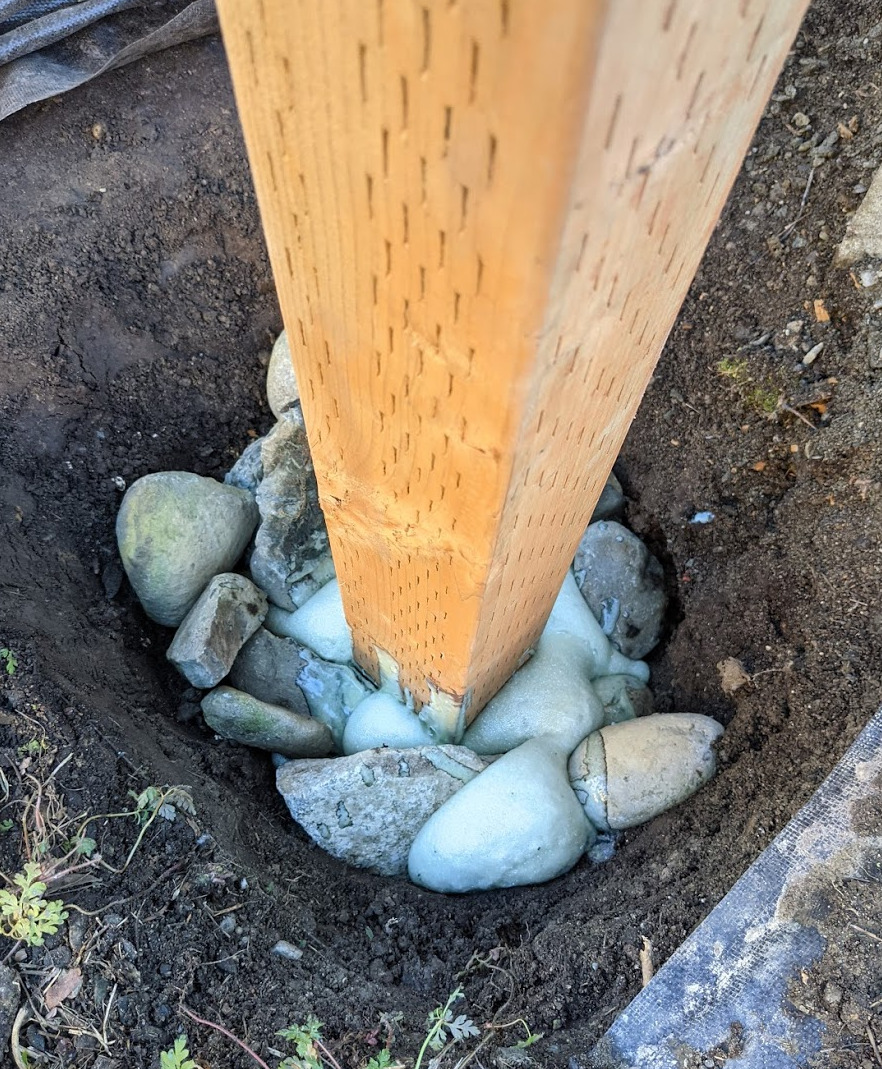
I set another 4x4 using instructions from this video. I really enjoy that home renovision channel.
It set up fairly nicely:
The last part was pretty straightforward: buy some cedar fence boards and screw them into the posts. I got a Homax EasyGate kit from the lumber store, and it was pretty easy to install. The final product: